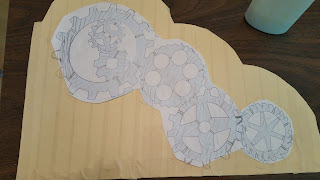
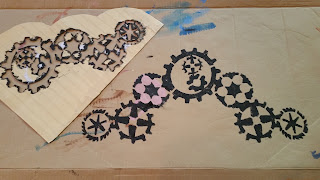
So I was doing a project for a charity and needed a stencil. I couldn't afford to buy one or have one made so I decided to make one. The end product is good for only a few uses but it is a great cheap way when needing a custom stencil.
Materials you will need:
- Cardstock or filefolder
- Glue
- X-acto knife
- A design
- Masking tape/ Clear packing tape
Step one: Decide on the area or size needed for your stencil. I was placing mine on a back of a chair so I traced the back of the chair to determine the size and shape my stencil needed to be.

Step two: Take masking tape or clear packing tape a create a layer of tape on both sides of folder.
 This will help protect the folder when getting it wet with paint. You don't have to do this step but I find that the stencil last a little bit longer if you do.
Step three: Glue your design onto the cardstock or file folder. This will make it easier to cut out the design. You can also just draw out your design onto the folder if you feel brave.

Step four: Make sure your design's negative space is interconnected. You can do this by adding linesto connect spaces.

(Before cutting out the stencil make sure you have something to protect your work surface. EX: cardboard, green cutting mat)
 Step five: Cut out the colored area. This process is going to take some time. I suggest listening to some rocking tunes or an awesome movie while working on cutting out the stencil.


Step six: Once your stencil is done being cut out I suggest doing a test run to see if you like how it
turned out. This way if you need to change something you wont ruin the project your working on.

Step seven: When you are satisfied with your stencil, stencil it on your project.


